|
How to Draw the Sri Yantra As you have probably found out already there are a great number of methods out there to draw the Sri Yantra. Most of them are very poor and will produce a figure with mistakes at many of the triple intersections. You should know that, at least in theory it is not possible to draw a perfect Sri Yantra. There is always some little mistake even if it can't be seen on the drawing. This method ensures that there will be mistakes at only two of the nodes, which is the minimum amount of mistakes possible when drawing this figure. This method will not necessarily produce an optimal Sri Yantra. For a method to draw the optimal Sri Yantra please go here. The goal of this page is to show the proper sequence in which the lines should be drawn. The Sri Yantra geometry has five degrees of freedom. In other words you will have to decide on the placement of five lines to construct the figure. The amount of mistake in the resulting figure will depend on where you have located these five lines. If the resulting figure has a big error (two extraneous triangles) you will have to go back and change the location of some of the lines and start over. If you want to experiment with the Sri Yantra withoug having to draw it try the interactive Sri Yantra. |

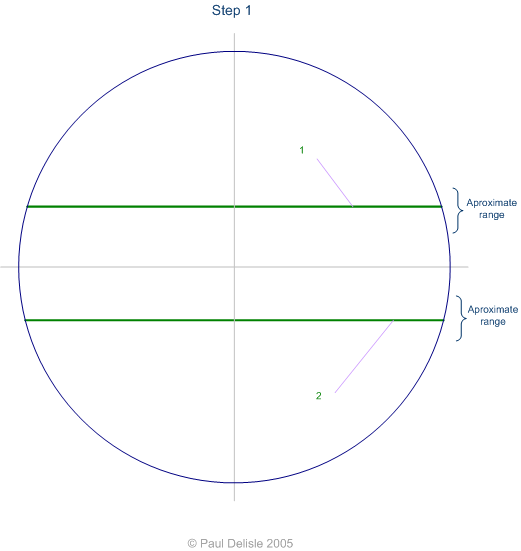
| The green lines are the key lines that define the Sri Yantra. They are not unique, in the sense that other lines could be selected. But there will always be 5 specific points to define the Sri Yantra. This is similar to an equation with five variables or five degrees of freedom.. You need to choose values (positions) for these five variables to completely define it's shape. By choosing different positions for these lines you will end up with different Sri Yantra configurations. |
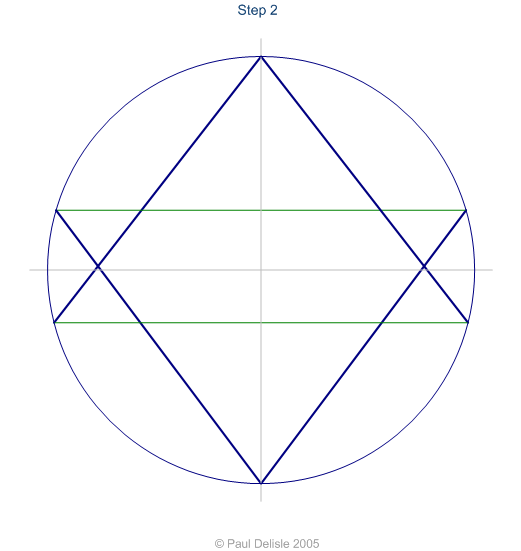
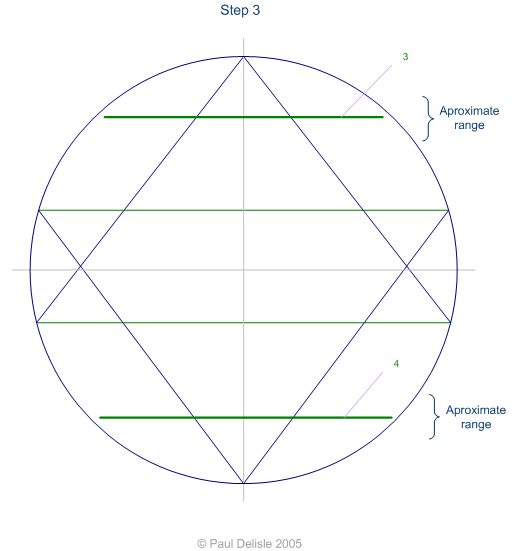
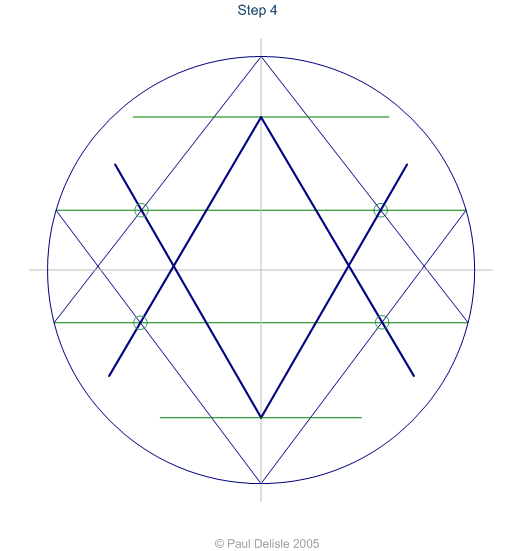
| The green circles shows the points that are used to draw the new lines. The other point is usually where the base of a triangle meets the vertical axis. New reference points are created every time a new line is drawn. |
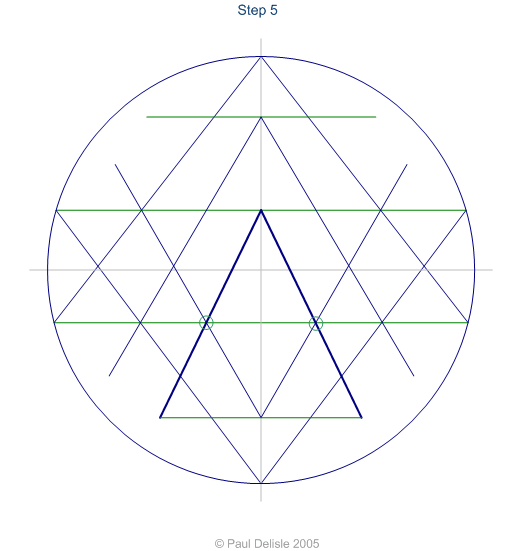
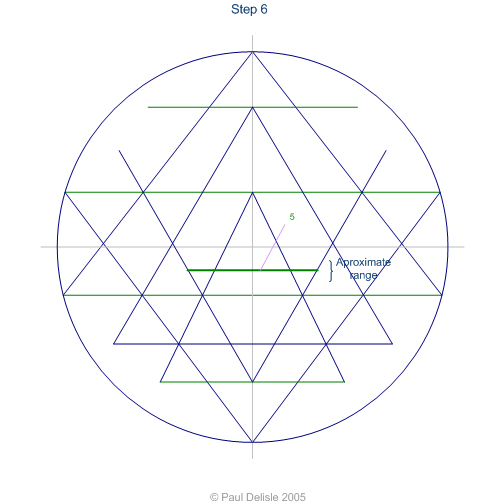
| Line 5 is the last line that is needed to finish the Sri Yantra. There is no real obvious way to know where it should go other than by trial and error. Of course this can be programmed and calculated but this is beyound the purpose of this page. In this example the 5th and last line is very close to it's ideal position so the error in the final figure is very small. If it is drawn higher or lower the error will increase proportionally. We will show later where the error shows up. |
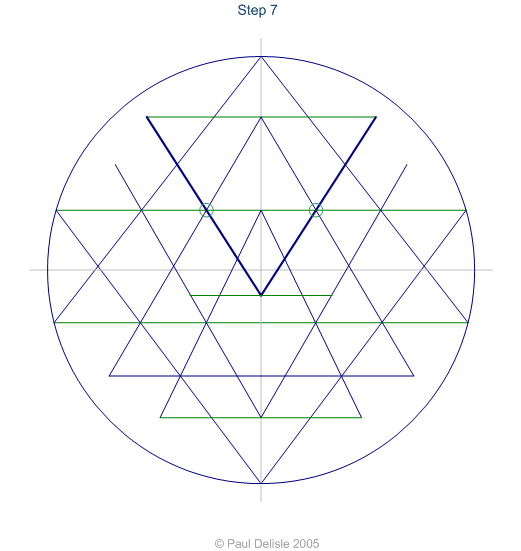
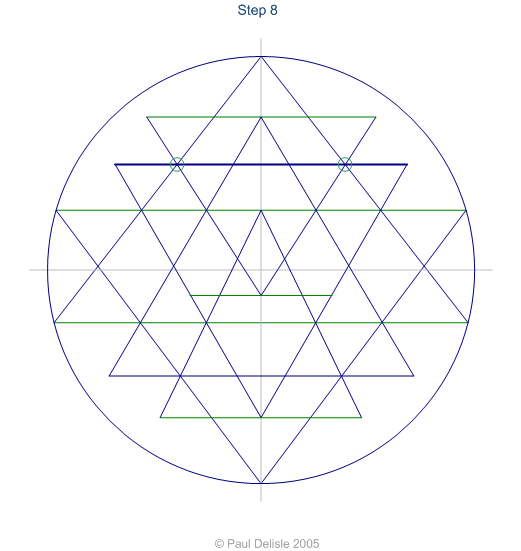
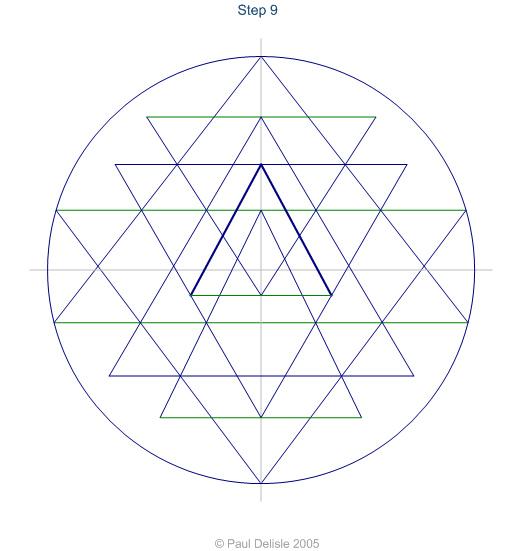
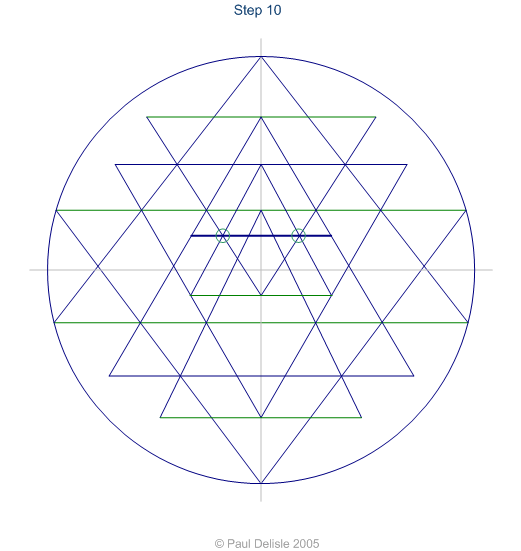
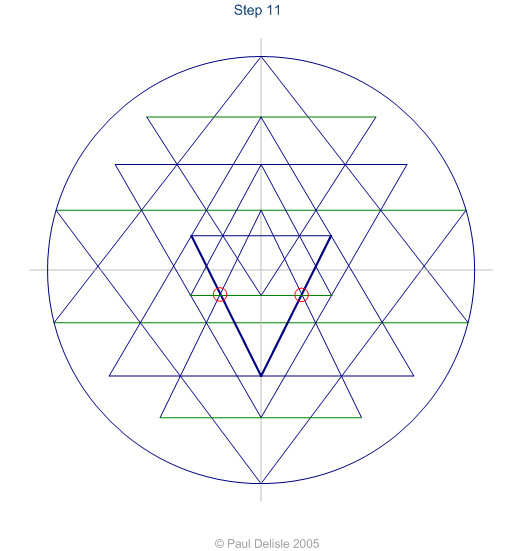
| Here is where the error shows up (indicated by the two red circles). In this case the error is small and hard to see in a drawing of this size. See caption of the right. Using a thicker line is a common way to disguise the errors. The thicker the line the more difficult to see the error. If the error is too big then we need to go back to step 6 and change the position of line 5. After redrawing you will see if the error is bigger or smaller. A bigger error indicates that you need to move the line in the opposite direction. |  |
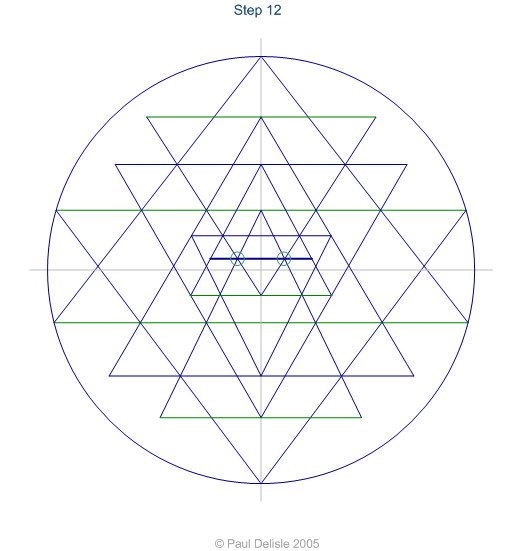
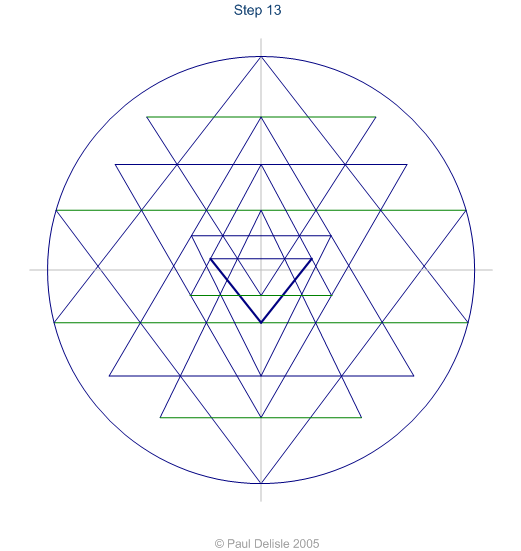
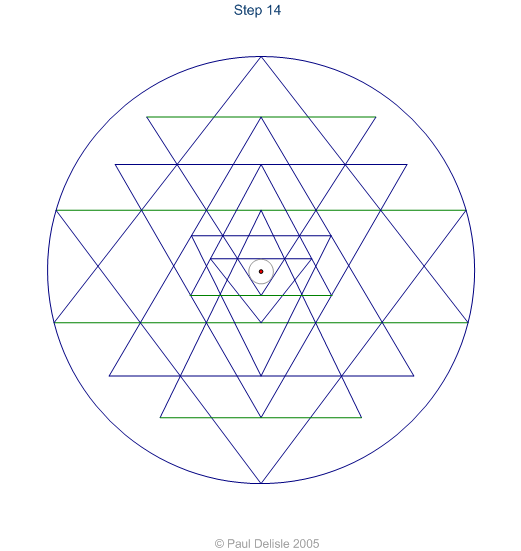
| The last step is to draw the bindu point. To find the center of the smallest inner triangle we draw a circle inside the triangle and locate the bindu at the center of that circle. |
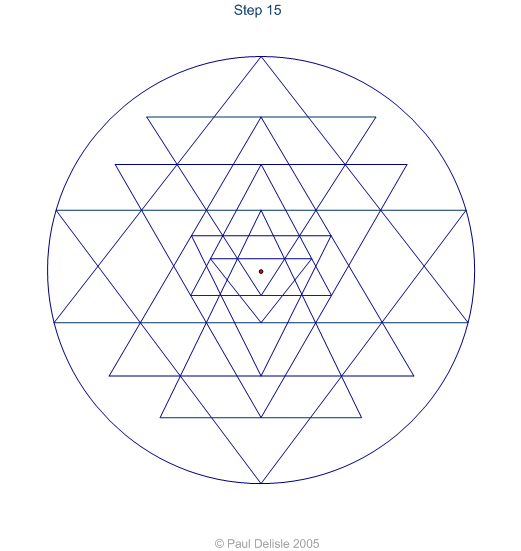
| This completes the drawing of the center part of the Sri Yantra. Not show here are the others circles with petals and the outer square enclosure. |
   |
||||
Breakthrough The Optimal Sri Yantra is the result of many years of reseach and mathematical investigation. Until now it could only be generated with a computer. Now a hand drawn method has finally been found. For more information read Solving the Sri Yantra. This method will allow you to draw a precise and perfectly centered Optimal Sri Yantra of any size with only a protractor, a ruler and a pen. The pdf file contains 49 illustrations for an easy step by step approach (see samples above). Also includes all the steps necessary to draw the outer enclosure (Bhupura). See sample drawings here. US $12 (Instant Download)
|